Finding a puddle under your kitchen sink is never a good sign, especially when it’s near your reverse osmosis (RO) system. These systems are a fantastic way to get clean, great-tasting water, but like any plumbing fixture, they can develop leaks. A leak doesn’t mean your system is broken beyond repair. In most cases, it’s a simple fix.
Common Causes of Leaks
Before you panic, it’s important to pinpoint the source of the leak. Most leaks originate from one of these common areas:
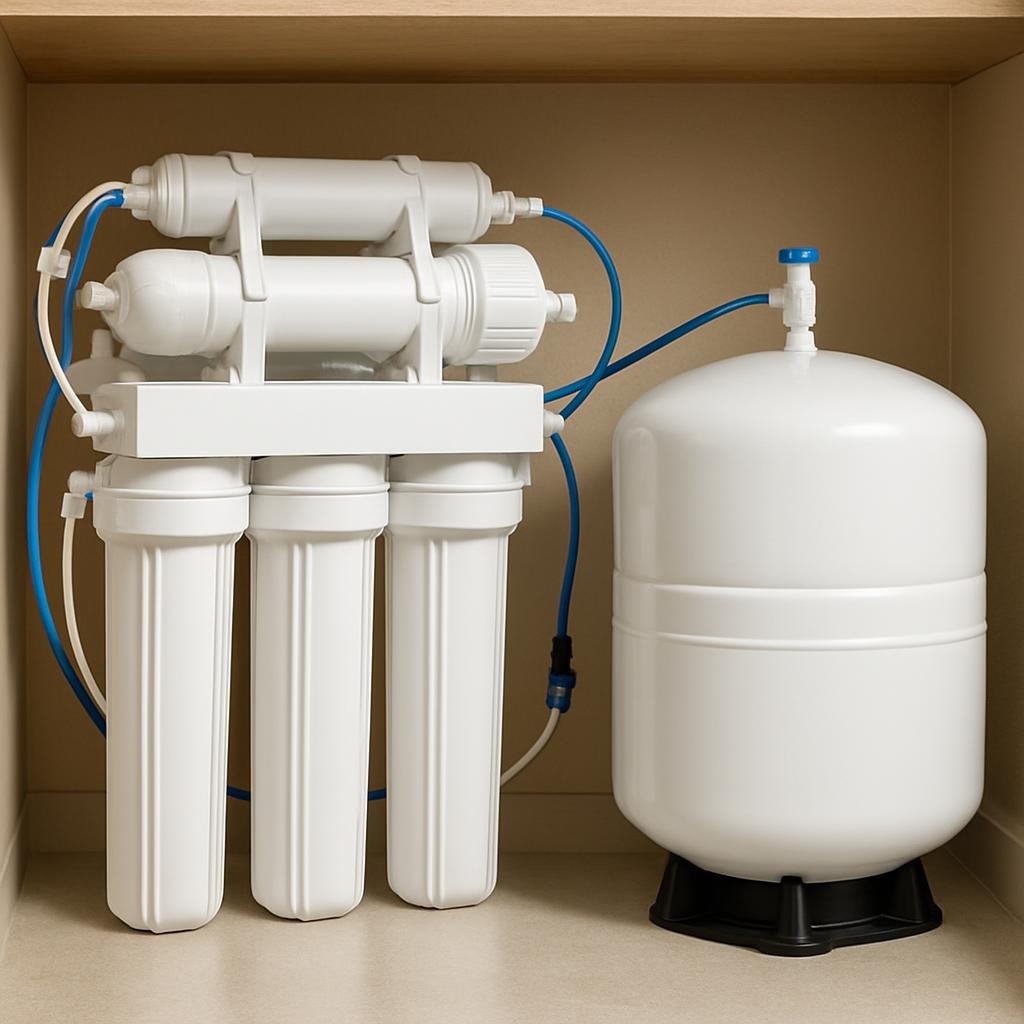
- Loose Fittings or Connections: This is the most frequent culprit. The plastic tubing that connects the different components of your RO system is held in place by push-to-connect fittings or threaded connections. Over time, vibrations or changes in water pressure can cause these fittings to loosen, creating a small drip.
- Worn O-Rings: The O-rings in the filter housings and other connections are designed to create a watertight seal. However, they can become dry, cracked, or compressed over time, losing their ability to seal effectively. When this happens, a leak is inevitable.
- Cracked Filter Housings: While less common, the plastic filter housings can sometimes crack, especially if they’ve been overtightened or exposed to a sudden surge in water pressure. A hairline crack can cause a slow, persistent leak.
- Faulty Faucet or Valve: The RO faucet on your countertop or the shut-off valve under the sink can also be the source of a leak. Check the base of the faucet and the handle for drips. The shut-off valve at the water line might also have a faulty seal.
- Improper Filter Installation: If you recently changed the filters and a leak started, it’s likely that one of the filter housings wasn’t screwed on correctly, or a filter wasn’t seated properly, preventing a tight seal.
How to Troubleshoot and Fix the Leak
Tackling the leak yourself is often straightforward. Here’s a step-by-step guide to help you find and fix the problem.
Step 1: Turn Off the Water
Before you do anything, you must shut off the water supply to the RO system. Look for the small valve that connects the system to your cold-water line and turn it off. Also, open the RO faucet to relieve any remaining pressure in the system.
Step 2: Dry and Inspect
Use a towel to thoroughly dry the entire RO system. This will make it much easier to spot the source of the leak. Pay close attention to all the fittings, filter housings, and the connections at the RO faucet.
Step 3: Check Fittings and Tubing
One of the easiest things to check is the tubing. Gently wiggle each tube at its connection point. If a tube pops out easily, the locking collar inside the fitting might be faulty, or the tube wasn’t inserted all the way. To fix this, push the tube firmly back into the fitting until it clicks into place. If it’s a threaded connection, try tightening it gently with a wrench, but be careful not to overtighten.
Step 4: Examine O-Rings and Housings
If the leak is coming from a filter housing, it’s time to inspect the O-rings. Unscrew the housing, remove the old filter, and carefully take out the O-ring. Check it for any cracks, nicks, or signs of wear. Apply a small amount of food-grade silicone grease to a new O-ring to ensure a good seal before placing it back in the groove. Then, screw the housing back on by hand until it’s snug.
Step 5: The “Paper Towel” Trick
For small, hard-to-find leaks, this trick works wonders. After drying the system, wrap a paper towel around each fitting and connection. Turn the water back on and watch the paper towels. The one that gets wet first will pinpoint the exact location of the leak.
When to Call a Professional
While most leaks are DIY-friendly, there are times when it’s best to call a professional. If you have a severe leak, a cracked manifold, or a problem you can’t identify, a licensed plumber or water filtration expert can diagnose and fix the issue safely. Don’t risk water damage to your cabinets or flooring.
Leave a Reply